Mini Pumpkin Pies
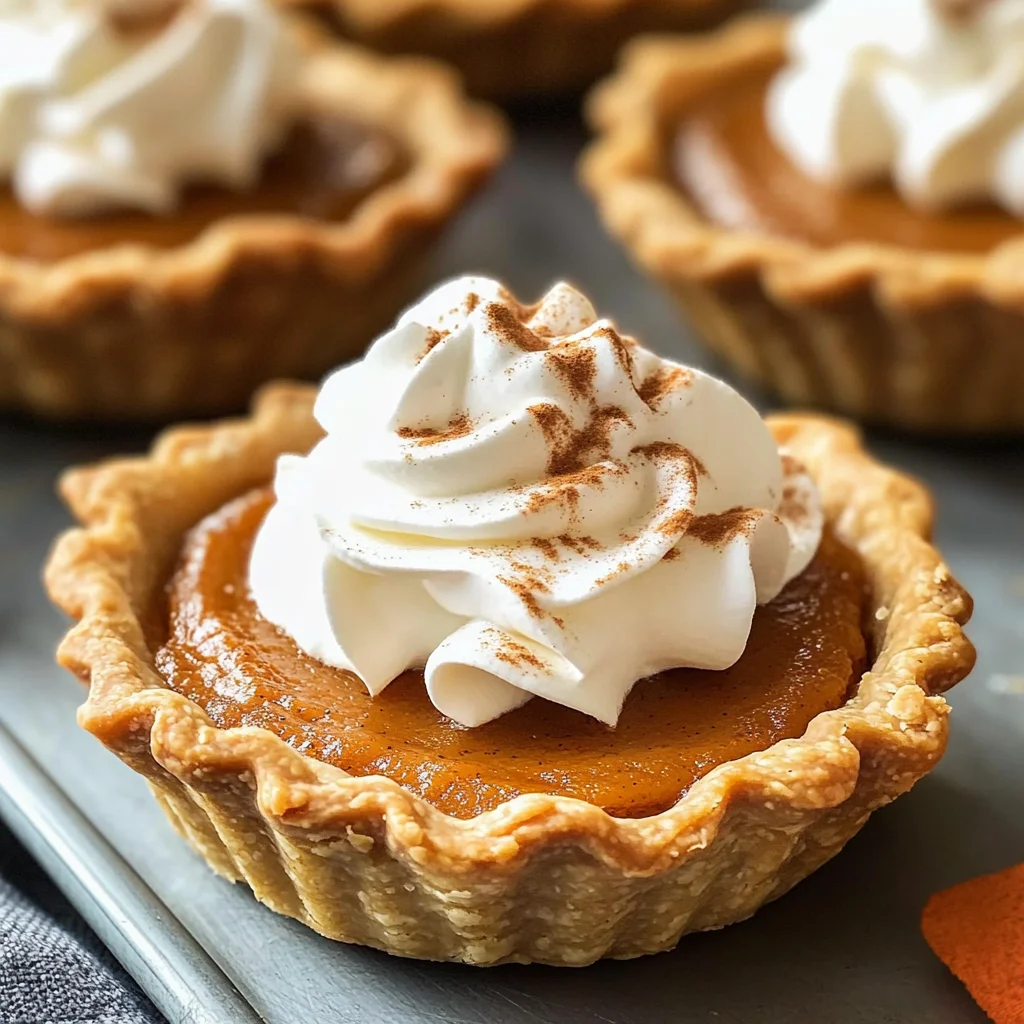
If you’re looking for a delightful treat that captures the essence of fall, these Mini Pumpkin Pies are just the thing! They pack all the cozy flavors of traditional pumpkin pie into adorable, individual servings. Perfect for busy weeknights or family gatherings, these mini delights will surely become a favorite in your home. Imagine serving them at your next get-together and watching everyone’s faces light up with joy!
What makes this recipe even more special is how easy it is to whip up a batch. Whether it’s for Halloween festivities or a cozy Thanksgiving dessert, these Mini Pumpkin Pies will impress your friends and family alike. Let’s dive into why you’ll love making these little pies!
Why You’ll Love This Recipe
- Quick and Easy: With simple steps and minimal prep time, you can have these pies ready in no time.
- Perfectly Portable: Their mini size makes them great for parties or potlucks; everyone can grab one (or two!).
- Crowd Pleaser: The classic pumpkin flavor is loved by all ages, making it an ideal dessert for any occasion.
- Make-Ahead Friendly: These pies can be made ahead of time and stored in the fridge, so they’re ready when you need them.
- Customizable Topping: Serve them plain or dress them up with homemade whipped cream for that extra touch!
Ingredients You’ll Need
To make these delicious Mini Pumpkin Pies, you’ll need some simple, wholesome ingredients that you likely already have on hand. Here’s what to gather:
For the Pie Crusts
- 2 9-inch unbaked pie crusts (homemade or store-bought)
For the Filling
- 1/3 cup brown sugar
- 2 tablespoons granulated sugar
- 1 1/2 teaspoons pumpkin pie spice
- 1/4 teaspoon salt
- 1 cup canned pumpkin puree (not pumpkin pie filling)
- 3/4 cup evaporated milk
- 1 large egg (lightly beaten)
- 1/2 teaspoon vanilla extract
To Serve
- Homemade whipped cream (for topping)
Now that we have our ingredients ready, let’s get started on making these delightful treats!
Variations
One of the best things about this recipe is its flexibility! You can easily tailor it to suit your taste or dietary preferences. Here are some fun ideas to try:
- Add a Twist: Mix in some chocolate chips or chopped nuts to the filling for an unexpected crunch!
- Spice It Up: Experiment with different spices like ginger or nutmeg to give your pies a unique flavor profile.
- Dairy-Free Option: Substitute the evaporated milk with coconut milk for a dairy-free version that is still creamy and delicious.
- Graham Cracker Crust: Swap out the traditional pie crust for crushed graham cracker crusts for a fun change!
How to Make Mini Pumpkin Pies
Step 1: Preheat Your Oven
First things first—preheat your oven to 400 degrees F. This step ensures that your pies bake evenly and develop that lovely golden crust.
Step 2: Roll Out the Pie Crusts
On a lightly floured surface, roll out the pie crusts until they are about 1/8-inch thick. Using a 3 1/2-inch cookie cutter or cup, cut out circles from the dough. If you have any scraps left over, just re-roll them to cut more circles!
Step 3: Shape the Crusts
Gently press each circle into the slots of two standard muffin pans. Make sure they fit snugly in each cavity. This step is vital as it forms the perfect little shell for all that delicious filling! Once done, pop the muffin pans in the fridge while you prepare your filling.
Step 4: Prepare the Filling
In a mixing bowl, whisk together brown sugar, granulated sugar, pumpkin pie spice, and salt until well combined. Then add in the pumpkin puree, evaporated milk, egg, and vanilla extract. Whisk until everything is fully blended—this mixture will be bursting with flavor!
Step 5: Fill and Bake
Remove those cute little crusts from the refrigerator and carefully fill each one with about 2 tablespoons of pumpkin filling. Bake in your preheated oven for about 16-20 minutes. Keep an eye on them; you want them set but not burnt—golden perfection is key!
Step 6: Cool Down
Once baked, take them out of the oven and let them cool on a wire rack for about 30 minutes. After cooling, gently remove them from the muffin pans and let them cool completely.
Step 7: Chill Out
After they’ve cooled down completely, place your mini pies in an airtight container and refrigerate for at least three hours or overnight if you can wait! Chilling helps deepen those flavors.
Step 8: Serve!
When you’re ready to serve them up, just take them out of the fridge. Enjoy them chilled or at room temperature—either way they’re scrumptious! Top with homemade whipped cream if you’d like a little extra sweetness.
There you have it—a delightful recipe full of love and warmth perfect for sharing with friends and family! Happy baking!
Pro Tips for Making Mini Pumpkin Pies
Making Mini Pumpkin Pies is easy and fun, but a few tips can help you achieve perfect results every time!
-
Use cold ingredients: Starting with cold pie crust and chilled filling helps to maintain the structure of the crust while baking, leading to a flakier texture.
-
Don’t overfill the crusts: Filling each pie crust about 2 tablespoons full ensures they bake evenly without overflowing, which keeps your mini pies looking lovely and neat.
-
Watch the baking time: Since ovens can vary, keep an eye on your pies during the last few minutes of baking to avoid overcooking. You want them set but still soft in the middle.
-
Cool completely before serving: Allowing your mini pies to cool completely not only enhances their flavor but also helps them hold their shape when you remove them from the muffin pan.
-
Experiment with spices: Feel free to tweak the pumpkin pie spice according to your taste. Adding a pinch of nutmeg or ginger can give your mini pies a unique twist!
How to Serve Mini Pumpkin Pies
Serving these delightful Mini Pumpkin Pies can be as creative as you like! They are perfect for gatherings, parties, or simply enjoying at home with family. Here are some ideas to present them beautifully.
Garnishes
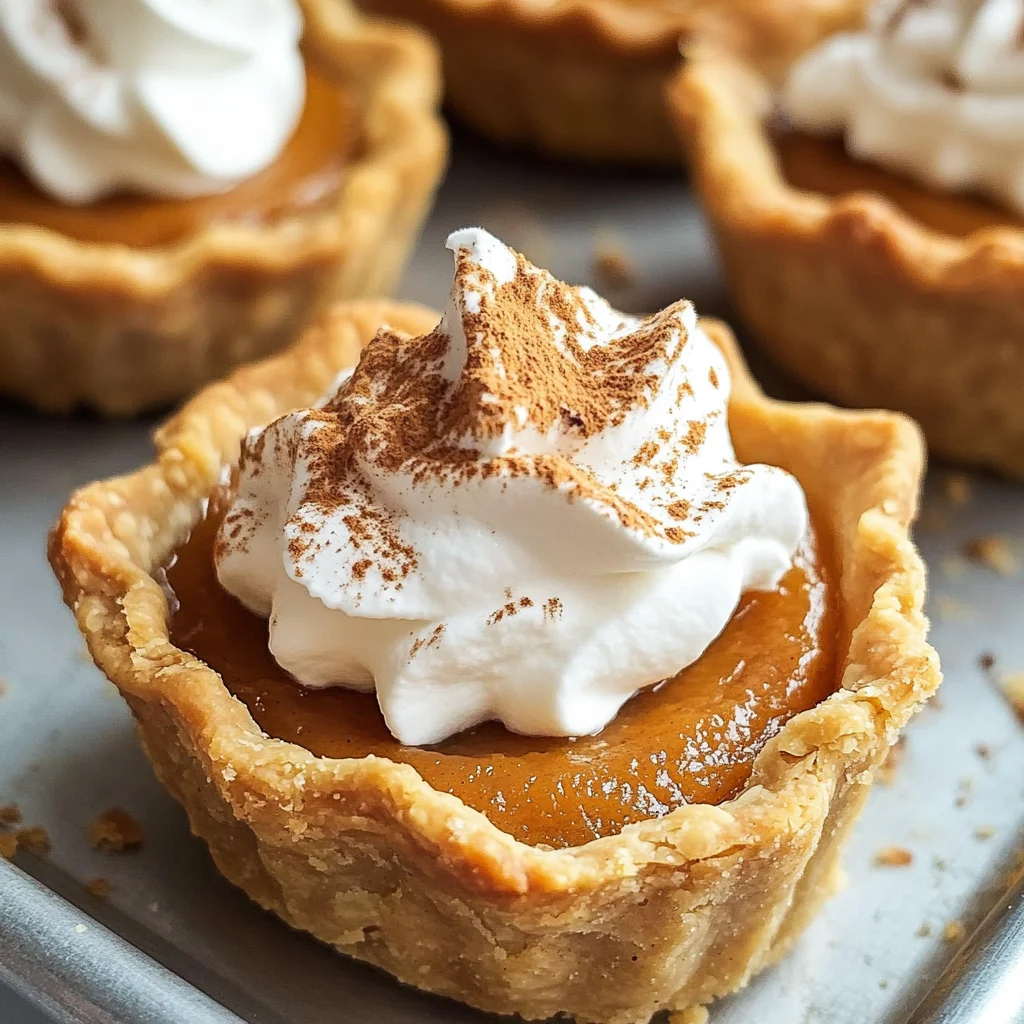
- Whipped Cream: A dollop of homemade whipped cream adds a creamy sweetness that complements the spiced pumpkin filling perfectly.
- Cinnamon Dust: A light sprinkle of cinnamon on top not only looks beautiful but also enhances the warm flavors of your mini pies.
- Chopped Nuts: Crushed pecans or walnuts provide a crunchy contrast and add an extra layer of flavor.
Side Dishes
- Apple Crisp: The sweet and tart combination of baked apples topped with a crispy oat topping pairs beautifully with pumpkin flavors.
- Cranberry Sauce: A tangy cranberry sauce adds a refreshing touch that balances out the sweetness of the mini pies.
- Vanilla Ice Cream: A scoop of vanilla ice cream melting over warm mini pumpkin pies creates a delightful contrast in temperature and texture.
- Hot Spiced Cider: Serve these mini treats alongside warm spiced cider for a cozy fall experience that warms both heart and soul.
Enjoy making and sharing these Mini Pumpkin Pies, whether it’s for a festive occasion or just because! Their individual servings make them perfect for any dessert table, leaving everyone craving more. Happy baking!
Make Ahead and Storage
These Mini Pumpkin Pies are perfect for meal prep, allowing you to enjoy a deliciously festive treat without the last-minute rush. Whether you’re preparing for a gathering or just craving a sweet bite, these pies can be made ahead of time and stored easily.
Storing Leftovers
- Place cooled Mini Pumpkin Pies in an airtight container.
- Store in the refrigerator for up to 3-4 days.
- If stacking, add parchment paper between layers to prevent sticking.
Freezing
- Allow the pies to cool completely before freezing.
- Wrap each pie individually in plastic wrap, then place them in a freezer-safe bag or container.
- They can be frozen for up to 2 months.
Reheating
- To reheat, preheat your oven to 350 degrees F.
- Remove pies from the refrigerator or freezer and unwrap them.
- Place on a baking sheet and heat for about 10-15 minutes or until warmed through.
FAQs
If you have any questions while making these delightful Mini Pumpkin Pies, you’re not alone! Here are some common queries that might help.
Can I make Mini Pumpkin Pies without an egg?
Absolutely! You can substitute the egg with 1/4 cup of unsweetened applesauce or a flax egg (1 tablespoon ground flaxseed mixed with 2.5 tablespoons water) for a vegan option.
How do I know when my Mini Pumpkin Pies are done?
Your Mini Pumpkin Pies are done when the filling is set and the crust is lightly golden brown. A toothpick should come out clean when inserted into the center.
What pairs well with Mini Pumpkin Pies?
These delightful treats pair wonderfully with homemade whipped cream, vanilla ice cream, or even a drizzle of caramel sauce for an extra special touch!
How long can I store Mini Pumpkin Pies?
You can store them in the refrigerator for up to 3-4 days. For longer storage, consider freezing them!
Can I use fresh pumpkin instead of canned pumpkin puree?
Yes! If you prefer fresh pumpkin, roast it until tender and blend it into a smooth puree before using it in your recipe.
Final Thoughts
I hope you feel inspired to whip up these adorable Mini Pumpkin Pies! They bring all the cozy flavors of fall into bite-sized delights that everyone will love. Enjoy making them for holidays, gatherings, or simply as a sweet treat at home. Happy baking!
Mini Pumpkin Pies
If you’re searching for a sweet treat that embodies the spirit of fall, look no further than Mini Pumpkin Pies! These charming little desserts are packed with the classic flavors of pumpkin pie, all in individual servings that make them perfect for gatherings or cozy nights at home. With a creamy pumpkin filling nestled in a flaky crust, these mini pies will delight friends and family alike. Plus, they’re quick to make, customizable, and can be prepared ahead of time, making them an ideal choice for any occasion. Get ready to impress everyone with these adorable bites of autumn bliss!
- Prep Time: 20 minutes
- Cook Time: 20 minutes
- Total Time: 40 minutes
- Yield: Approximately 12 servings 1x
- Category: Dessert
- Method: Baking
- Cuisine: American
Ingredients
- 2 unbaked pie crusts (9-inch)
- 1/3 cup brown sugar
- 2 tablespoons granulated sugar
- 1 1/2 teaspoons pumpkin pie spice
- 1/4 teaspoon salt
- 1 cup canned pumpkin puree
- 3/4 cup evaporated milk
- 1 large egg (lightly beaten)
- 1/2 teaspoon vanilla extract
- Homemade whipped cream (for topping)
Instructions
- Preheat your oven to 400°F (200°C).
- Roll out the pie crusts to about 1/8-inch thickness. Cut into circles using a cookie cutter.
- Press each circle into the muffin pan slots and refrigerate while preparing the filling.
- In a bowl, whisk together brown sugar, granulated sugar, pumpkin pie spice, and salt. Mix in pumpkin puree, evaporated milk, egg, and vanilla until smooth.
- Fill each crust with about 2 tablespoons of filling and bake for 16-20 minutes until set.
- Cool on a wire rack before refrigerating for at least three hours.
- Serve chilled or at room temperature, topped with homemade whipped cream if desired.
Nutrition
- Serving Size: 1 mini pumpkin pie (45g)
- Calories: 150
- Sugar: 10g
- Sodium: 85mg
- Fat: 7g
- Saturated Fat: 4g
- Unsaturated Fat: 2g
- Trans Fat: 0g
- Carbohydrates: 20g
- Fiber: 1g
- Protein: 2g
- Cholesterol: 25mg