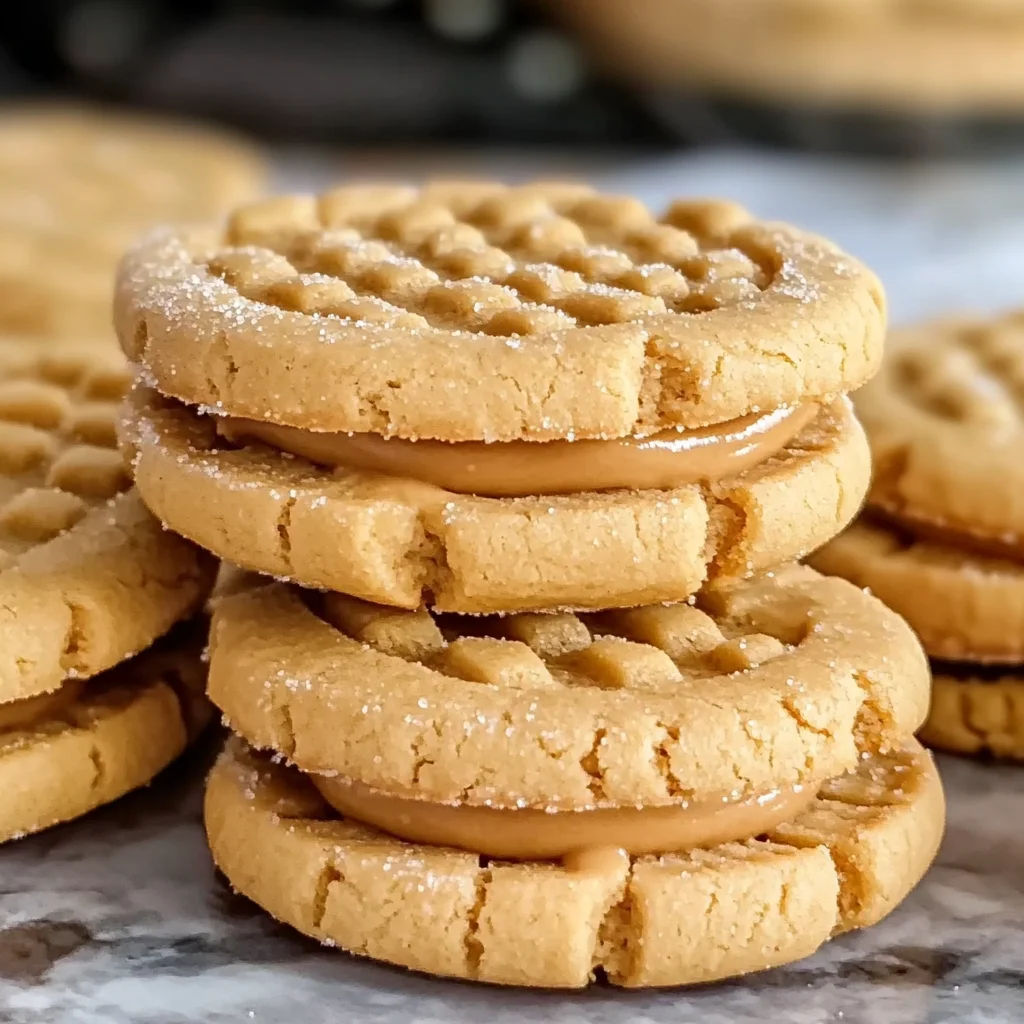
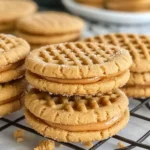
Homemade Copycat Nutter Butters
If you’re looking for a treat that brings back childhood memories, then you need to try these Homemade Copycat Nutter Butters! There’s something magical about the combination of soft, chewy peanut butter cookies and a creamy filling that makes every bite feel like a warm hug. This recipe is not just delicious; it’s also easy enough to whip up on busy weeknights or special enough for family gatherings and celebrations.
I love making these cookies with my kids, who get excited as they help shape the dough and create the signature crosshatch design with a fork. They are perfect for lunch boxes, after-school snacks, or simply when you want to indulge in something sweet. Trust me, once you try these homemade delights, you’ll never look back!
Why You’ll Love This Recipe
- Quick and Easy: With just 30 minutes from start to finish, this recipe fits perfectly into any busy schedule.
- Family-Friendly Fun: Kids can help in the kitchen, making it a fun bonding experience while creating something delicious together.
- Nostalgic Flavor: These cookies bring back the classic taste of your favorite childhood snack, but made fresh at home!
- Make-Ahead Convenience: You can prepare the cookie dough ahead of time and bake them when you’re ready for a sweet treat.
- Endless Enjoyment: Perfect for all occasions—whether it’s a casual dessert or a special celebration.
Ingredients You’ll Need
These Homemade Copycat Nutter Butters use simple and wholesome ingredients that you probably already have in your kitchen. Let’s gather everything we need for this delightful baking adventure!
For the Cookies:
- 1/2 cup unsalted butter, softened
- 1/2 cup creamy peanut butter
- 1/2 cup granulated sugar (plus extra for topping)
- 1/2 cup brown sugar
- 1 large egg
- 1 teaspoon vanilla extract
- 1 1/4 cups all-purpose flour
- 3/4 teaspoon baking soda
- 1/4 teaspoon salt
For the Filling:
- 1/2 cup creamy peanut butter
- 1/4 cup unsalted butter, softened
- 1 cup powdered sugar
- 1 teaspoon vanilla extract
- 1–2 tablespoons milk (as needed for texture)
Variations
One of the great things about this recipe is its flexibility! Feel free to get creative with flavors and textures.
- Add Some Chocolate: Mix in chocolate chips into the cookie dough for an extra indulgent treat.
- Switch Up the Nut Butter: Try using almond or cashew butter instead of peanut butter if you’re feeling adventurous.
- Go Vegan: Substitute vegan butter and flax eggs for a plant-based version of this classic cookie.
- Experiment with Flavors: Add spices like cinnamon or nutmeg to give your cookies a unique twist.
How to Make Homemade Copycat Nutter Butters
Step 1: Preheat Your Oven
First things first! Preheat your oven to 350°F (175°C). This step is crucial because it ensures that your cookies bake evenly and come out just right. While that’s warming up, line a baking sheet with parchment paper to prevent sticking.
Step 2: Cream Together Your Ingredients
In a large bowl, cream together the softened butter, creamy peanut butter, granulated sugar, and brown sugar until it’s light and fluffy. This process incorporates air into your mixture, resulting in soft cookies. It’s one of my favorite parts because the smell is so heavenly!
Step 3: Add Egg and Vanilla
Next, mix in the egg and vanilla extract until well combined. The egg acts as a binder in your cookie dough, helping it hold everything together beautifully while adding richness.
Step 4: Combine Dry Ingredients
In another bowl, whisk together flour, baking soda, and salt. Gradually add this dry mixture into your wet ingredients. Stir until just combined; overmixing can lead to tougher cookies. We want them soft and chewy!
Step 5: Shape Your Cookies
Roll the dough into small balls (about one inch) and shape them into ovals. Press each oval with a fork to create that classic crosshatch pattern on top—this not only looks cute but helps them bake evenly too! Don’t forget to sprinkle some sugar on top before baking for that extra sweetness.
Step 6: Bake Until Golden Brown
Bake your cookies in the preheated oven for about 8–10 minutes until they are lightly golden around the edges. Letting them cool completely is important—they will firm up as they cool down!
Step 7: Prepare Your Creamy Filling
For that delicious filling, beat together peanut butter and softened butter until smooth. Then add powdered sugar and vanilla extract until creamy. Adjust the texture with milk as needed—this filling should be luscious but not too runny.
Step 8: Assemble Your Sandwiches
Once your cookies are cool, spread or pipe that dreamy filling onto one flat side of each cookie. Top with another cookie to create delightful sandwiches that will make everyone smile!
And there you have it—your very own Homemade Copycat Nutter Butters! Enjoy these treats fresh out of the oven or store them in an airtight container for later indulgence. Happy baking!
Pro Tips for Making Homemade Copycat Nutter Butters
Making cookies from scratch can be a delightful experience, and with these pro tips, you can ensure your Homemade Copycat Nutter Butters turn out perfectly every time!
-
Use room temperature ingredients: Ingredients like butter and eggs blend more smoothly when they’re at room temperature. This helps create a soft, fluffy dough that will result in tender cookies.
-
Do not overmix the dough: Once you add the dry ingredients to the wet ones, mix just until combined. Overmixing can lead to tough cookies due to gluten development.
-
Chill the dough: If you have extra time, refrigerate the dough for about 30 minutes before baking. This helps the flavors meld together and results in a thicker cookie that holds its shape during baking.
-
Check for doneness: Since oven temperatures can vary, keep an eye on your cookies during the last few minutes of baking. They should be lightly golden around the edges but still soft in the center.
-
Store properly: To keep your cookies fresh longer, store them in an airtight container at room temperature. You can also freeze them for up to three months—just make sure to separate layers with parchment paper!
How to Serve Homemade Copycat Nutter Butters
These delicious Homemade Copycat Nutter Butters are perfect for any occasion! Whether you’re hosting a gathering or just enjoying a quiet evening at home, presenting these treats beautifully can elevate any moment.
Garnishes
- Chopped peanuts: Sprinkle some chopped peanuts on top of the filling for an extra crunch and nutty flavor.
- Chocolate drizzle: A simple drizzle of melted dairy-free chocolate adds a lovely touch and pairs wonderfully with the peanut butter.
Side Dishes
- Fresh fruit platter: A colorful assortment of seasonal fruits such as strawberries, apples, and grapes provides a refreshing contrast to the rich cookies.
- Milk alternative: Serve these cookies with your favorite milk alternative—almond, oat, or soy milk are great choices that complement the peanut butter flavor.
- Coffee or tea: A warm cup of coffee or herbal tea balances out the sweetness of the cookies while providing a cozy atmosphere for enjoying them.
- Ice cream: For an indulgent treat, serve these cookies alongside a scoop of dairy-free ice cream for a delightful dessert experience!
Enjoy crafting and sharing these nostalgic treats with friends and family! Your Homemade Copycat Nutter Butters will surely bring smiles and satisfy cravings!

Make Ahead and Storage
These Homemade Copycat Nutter Butters are perfect for meal prep! You can whip up a batch in advance, making them a great treat for busy days or to share with friends.
Storing Leftovers
- Store the sandwich cookies in an airtight container at room temperature for up to 5 days.
- If you have leftover filling, keep it in the refrigerator for up to a week. Just be sure to let it come to room temperature before using it again.
Freezing
- To freeze the cookies, place them in a single layer on a baking sheet and freeze until solid.
- Once frozen, transfer them to an airtight container or freezer bag for up to 3 months.
- If freezing the filling, store it in an airtight container in the freezer for up to 2 months.
Reheating
- To enjoy your cookies warm, pop them in the microwave for about 10-15 seconds.
- If they’ve been frozen, let them thaw at room temperature for about 30 minutes before reheating.
FAQs
Here are some common questions about making these delightful cookies!
Can I make these Homemade Copycat Nutter Butters gluten-free?
Absolutely! Simply substitute the all-purpose flour with a gluten-free flour blend. Make sure it’s one that’s suitable for baking to achieve the best results.
How do I know when my Homemade Copycat Nutter Butters are done baking?
Your cookies should be lightly golden around the edges but still soft in the center. They will firm up as they cool, so don’t worry if they seem soft when you take them out of the oven!
Can I use crunchy peanut butter instead of creamy?
Yes! Using crunchy peanut butter will add a nice texture to your cookies. Just keep in mind that it may alter the creaminess of the filling slightly.
What can I do if my filling is too thick?
If your peanut butter filling is too thick, gradually add milk one tablespoon at a time until you reach your desired consistency. You want it creamy but still spreadable!
Final Thoughts
I hope you’re excited to try making these Homemade Copycat Nutter Butters! They bring back such wonderful memories and are bound to become a favorite treat in your home. Enjoy every moment of creating these delicious cookies—whether it’s just for you or shared with loved ones. Happy baking!
Homemade Copycat Nutter Butters
Indulge in the delightful flavors of Homemade Copycat Nutter Butters, a nostalgic treat that captures the essence of childhood memories. These scrumptious sandwiches feature soft, chewy peanut butter cookies filled with a creamy peanut butter filling that will leave you yearning for more. Perfect for busy weeknights or special family gatherings, this recipe is not only easy to make but also provides a fun baking experience for kids. Enjoy these delectable cookies fresh out of the oven, or store them for later—either way, they are sure to bring joy to your day!
- Prep Time: 15 minutes
- Cook Time: 10 minutes
- Total Time: 25 minutes
- Yield: About 12 sandwich cookies 1x
- Category: Dessert
- Method: Baking
- Cuisine: American
Ingredients
- 1/2 cup unsalted butter, softened
- 1/2 cup creamy peanut butter
- 1/2 cup granulated sugar (plus extra for topping)
- 1/2 cup brown sugar
- 1 large egg
- 1 teaspoon vanilla extract
- 1 1/4 cups all-purpose flour
- 3/4 teaspoon baking soda
- 1/4 teaspoon salt
- 1/2 cup creamy peanut butter (filling)
- 1/4 cup unsalted butter, softened (filling)
- 1 cup powdered sugar (filling)
- 1 teaspoon vanilla extract (filling)
- 1–2 tablespoons milk (as needed for texture)
Instructions
- Preheat oven to 350°F (175°C) and line a baking sheet with parchment paper.
- In a large bowl, cream together softened butter, peanut butter, granulated sugar, and brown sugar until light and fluffy.
- Mix in the egg and vanilla extract until combined.
- In another bowl, whisk together flour, baking soda, and salt; gradually add to the wet mixture until just combined.
- Roll dough into small balls and shape into ovals; create a crosshatch pattern with a fork and sprinkle with extra sugar.
- Bake for 8–10 minutes or until lightly golden around the edges; allow to cool completely.
- For the filling, beat together peanut butter and softened butter until smooth; mix in powdered sugar and vanilla extract, adjusting texture with milk as needed.
- Spread filling on one cookie half and top with another to create sandwiches.
Nutrition
- Serving Size: 1 cookie sandwich (45g)
- Calories: 190
- Sugar: 12g
- Sodium: 160mg
- Fat: 9g
- Saturated Fat: 3g
- Unsaturated Fat: 5g
- Trans Fat: 0g
- Carbohydrates: 26g
- Fiber: 1g
- Protein: 4g
- Cholesterol: 15mg